
These types of project are worth considering, not just because it is a hospital but because of the mixed solid wall construction and the challenges it brings. There have been a number of research papers from noted academics over the past number of years which serve to highlight the issues, some of the myths and also to suggest actual solutions and guides. The most recent such paper is below from SDAR by Joseph Little and Benat Arregi in which they focus on a Dublin solid wall project where various measures are investigated and risks evaluated.
Hygrothermal Risk Evaluation for the Retrofit of a Typical Solid-walled Dwelling
Another relevant paper is Historic Scotland paper 15 (By Joseph Little, Calina Ferraro & Beñat Arregi) in which various solutions are tested and analysed – this paper was particularly interesting as it highlights issues with what have become standard upgrade measures using vcls or ‘intelligent’ vcls. We have always had a particular issue with vcl’s in solid wall upgrades as it is rarely possible to have the installation to a a high enough level to avoid risk. We know technically its possible but we just haven’t seen it happen – floor junctions, services and real world issues just make it too difficult. Commercial conservation buildings also have higher humidity loads and as We like these papers as they use WUFI and dont rely on an outdated and risky assessment programme using the glazer method. (This method can have its uses but not for solid walls or flat roofs)
Technical Paper 15 – Assessing risks in insulation retrofits using hygrothermal software tools
If we take the existing solid wall – in a relatively poor condition and with areas exposed to driving rain this actually quickly rules out most types of insulation. Unless an independent consultant actually tests the wall using a Karsten tube, carries out Wufi analysis over 5-7 years using local climate data and with applicable PI insurance it is becoming clear that Calcium silicate insulation can be viewed as the most risk averse or safest solution.
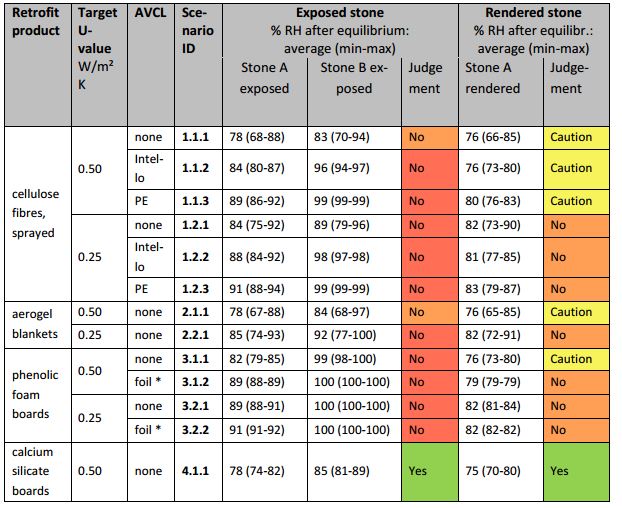
Calcium silicate from Partel – Its the only ‘green light’ system in – graph from HS-15
We actually analysed this wall using WUFI with the following conclusion extracted from our formal report.
”It was interesting to note that in winter months the relative humidity increased to high 80% and will reach this figure annually for sustained periods. The highest recommended figures for Epatherm calcium silicate are actually much higher at 95%. This figure of 95% applies only if the system is fully bonded, capillary active, hygroscopic and alkaline. Equilibrium was reached 2-3 years in all cases with water content levels acceptable.
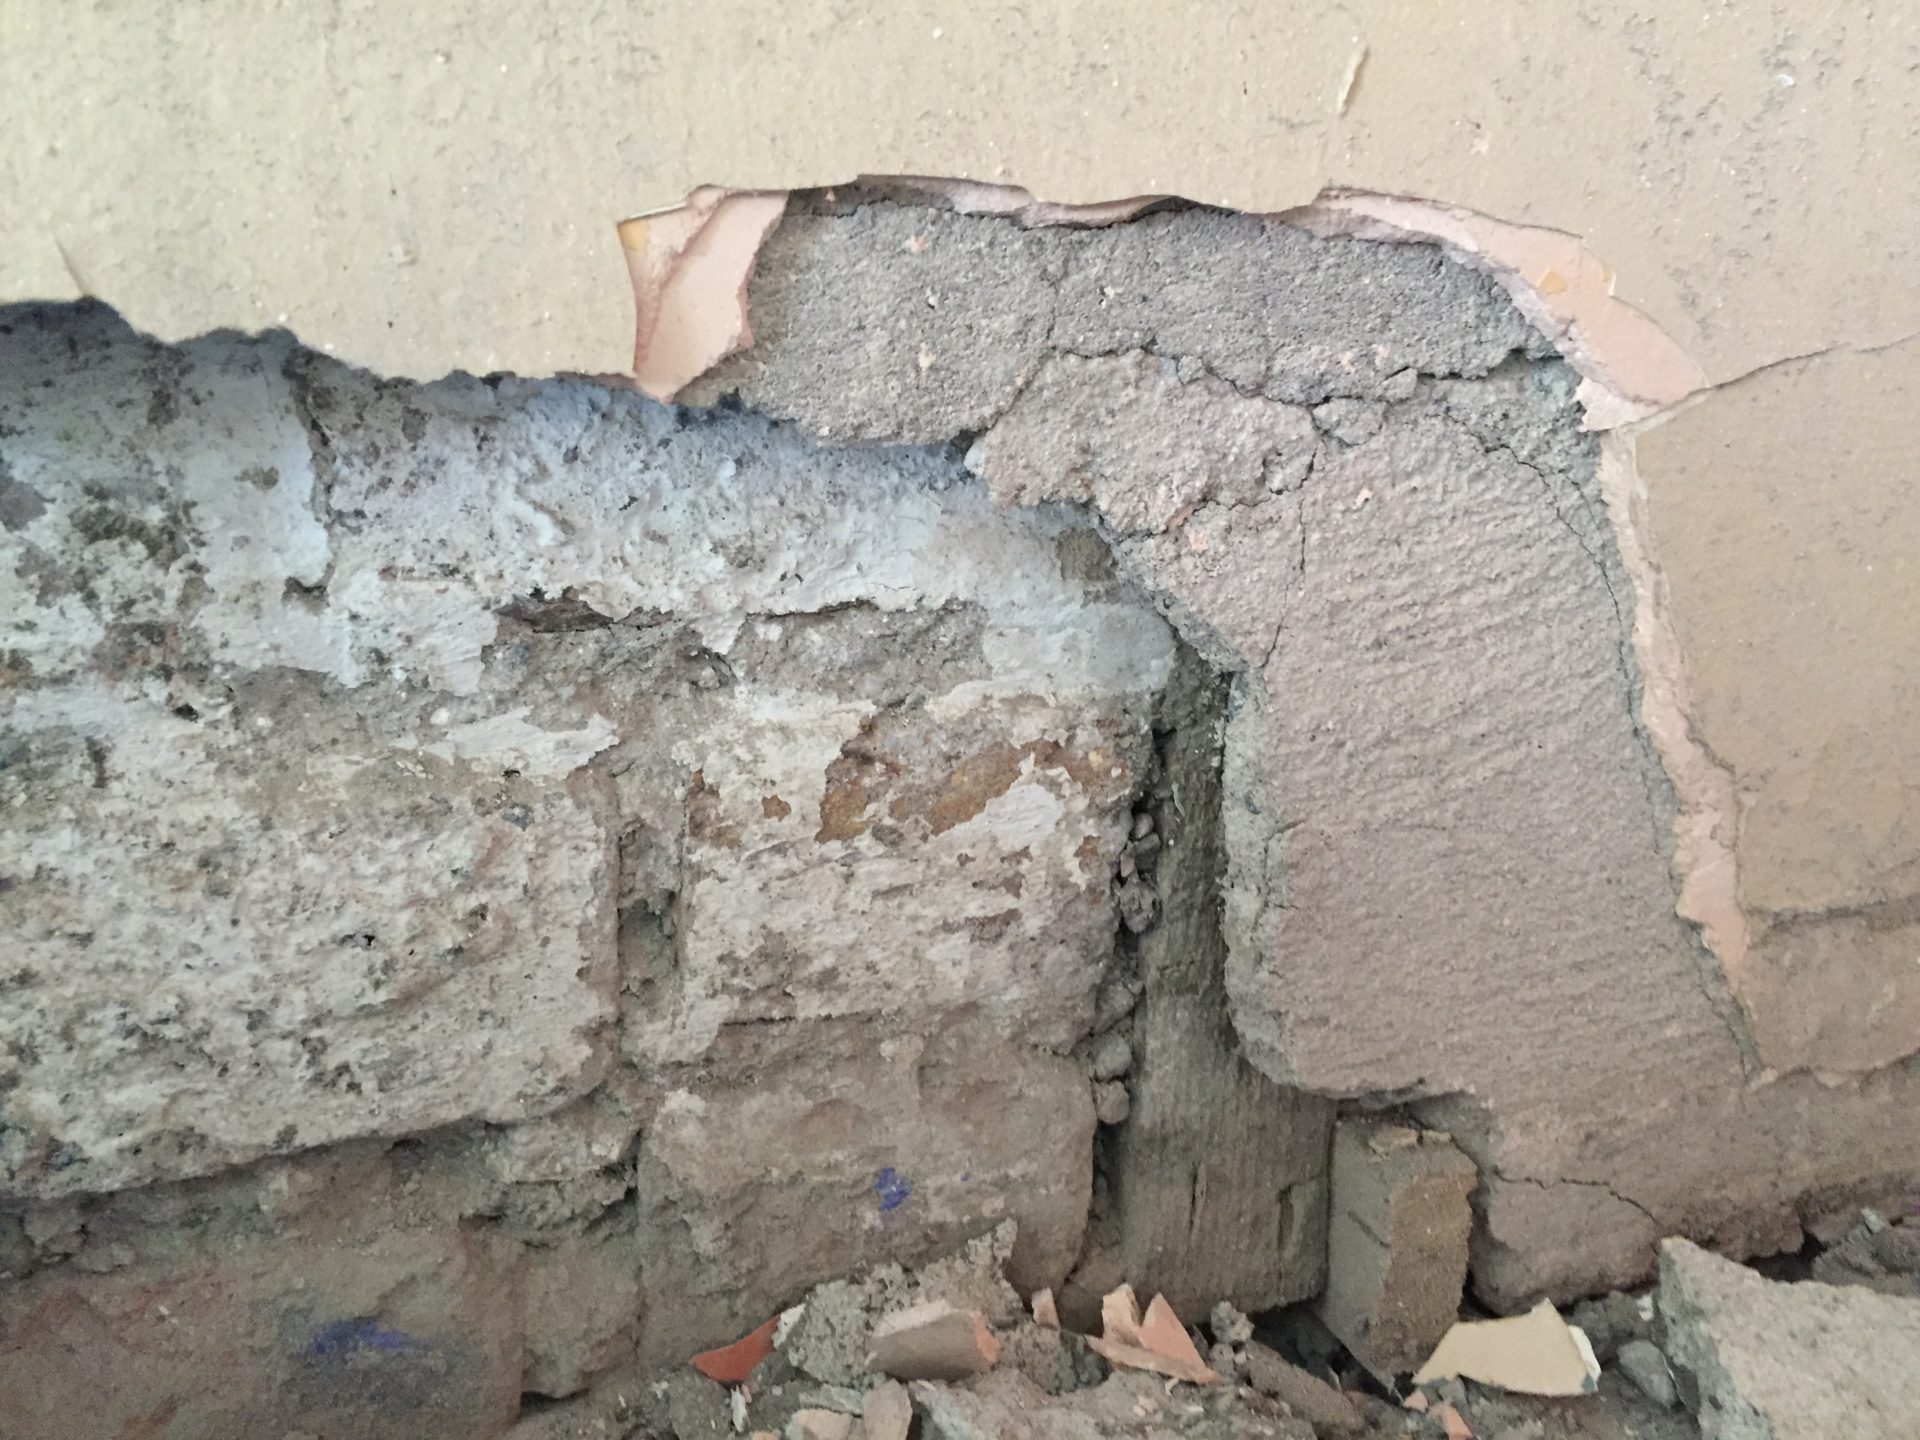
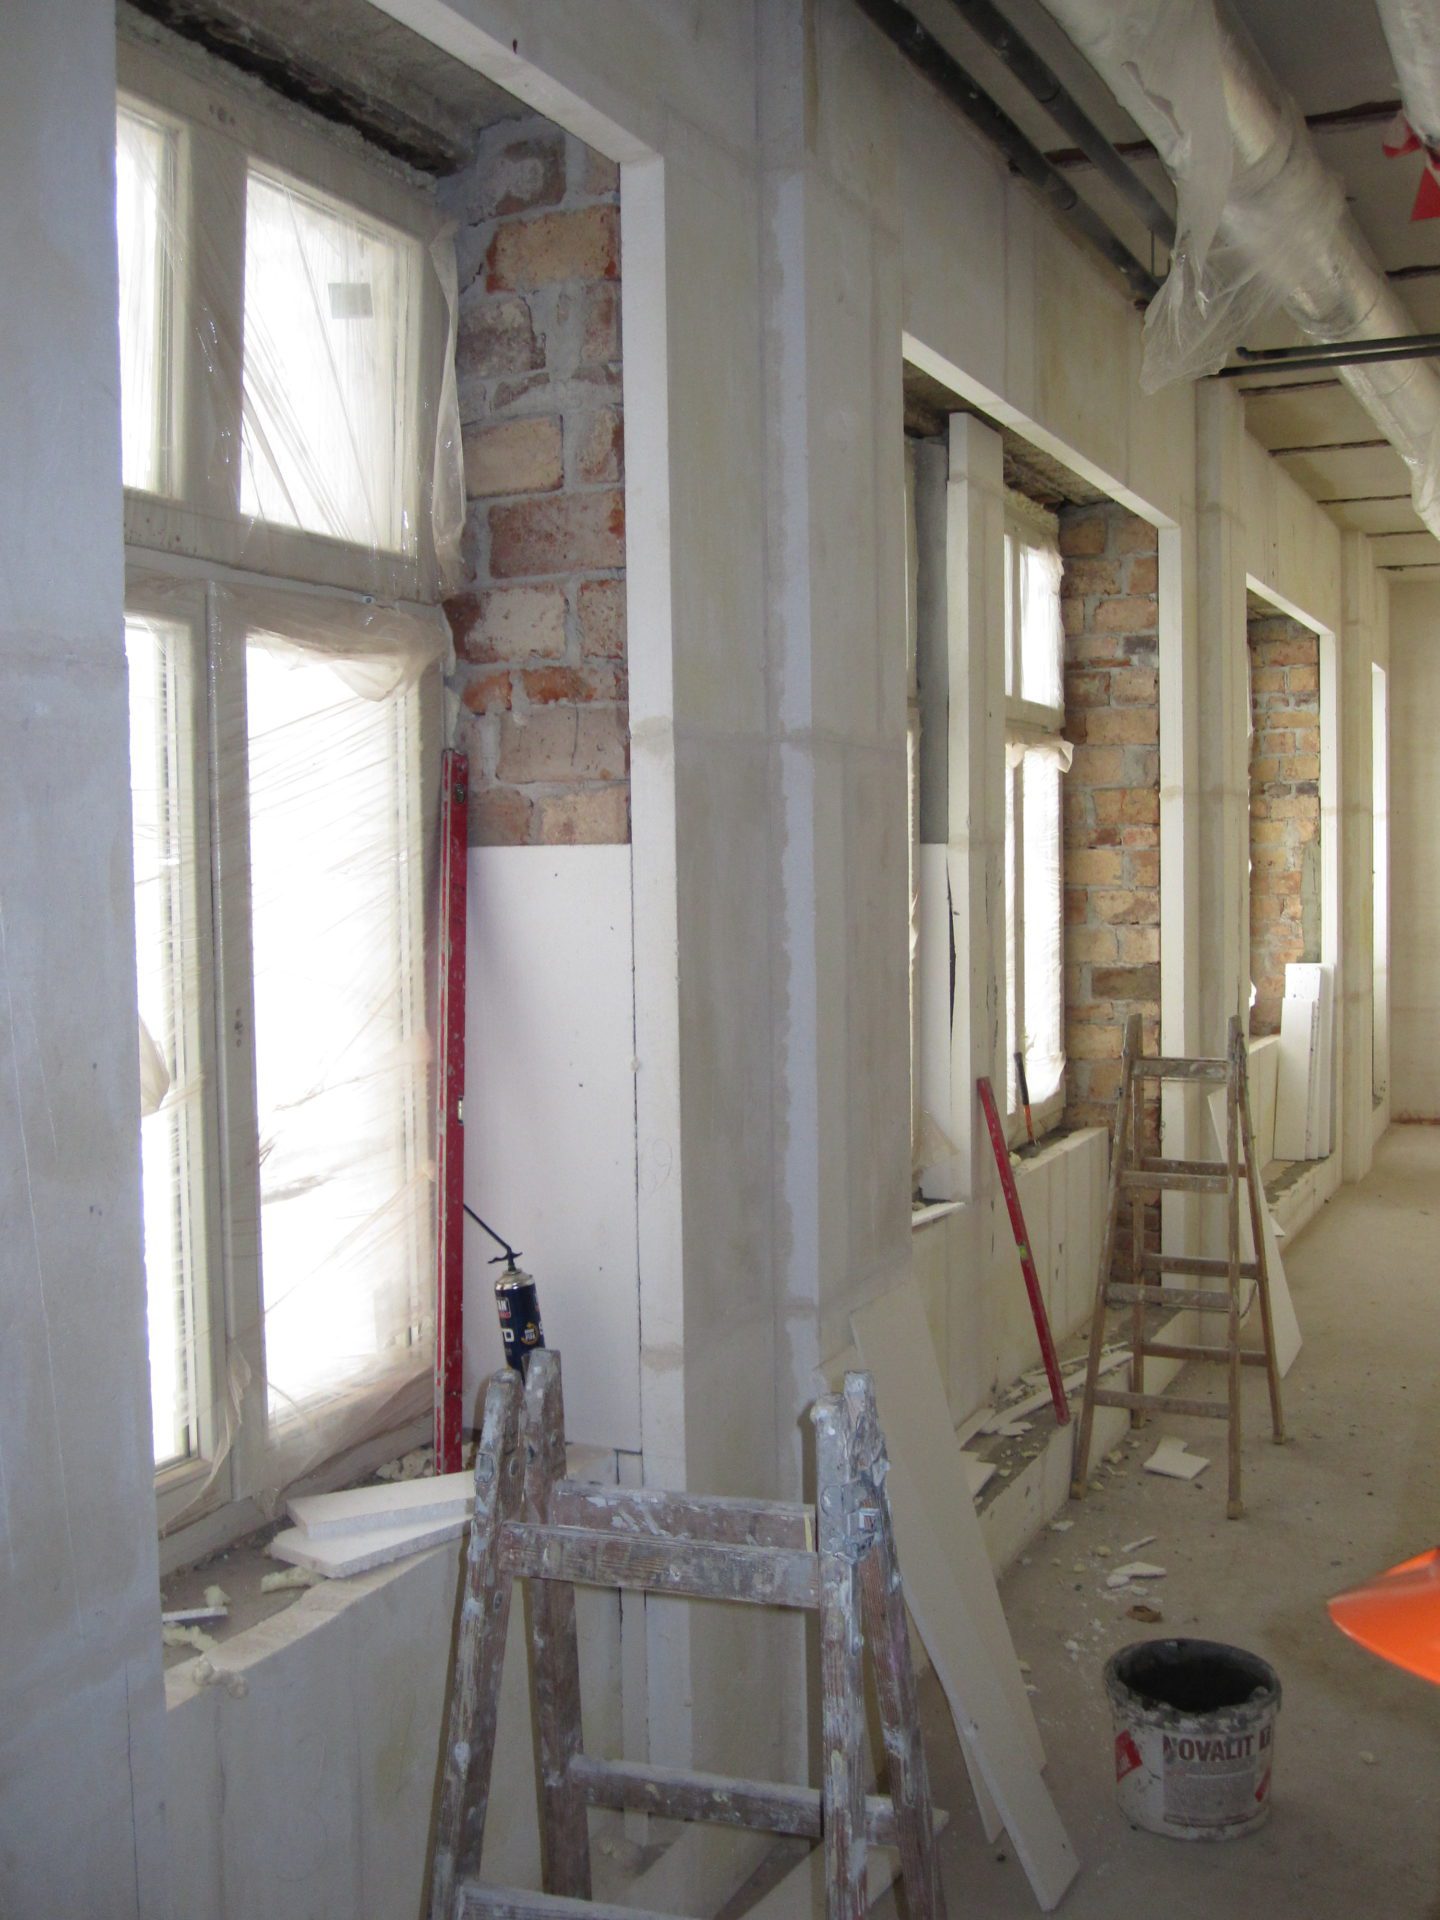
Existing wall
There is considerable safety in choosing the EPATHERM system featuring all system parts as the simulated outputs have relative humidity below the 95% threshold.
Installation of Epatherm
A horizontal DPC would normally be recommended in such historic retrofits. There is an EPATHERM system part that would be recommended to be installed. A Chemical is injected at ground floor level to ‘create’ the dpc in the normal location thus reducing risks of moisture loads from rising damp. The Horizontal DPC by Epasit is Epasit MSP. In this case due to the existing vented basement we are satisfied that this will not be necessary in this instance.
The installation of a breathable external brick seal – Natural product – would further improve the position – if desired the product is Epasit IP237”
Insulation Guide –EPATHERM GENERAL
- Ensure existing Brick clean and dry and free of lose components. Use a Lime plaster (Epasit MPM1 or MPM 2) to level if required. Generally if brick in reasonable condition the system can be applied directly. Lime levelling coat is preferred in conservation projects. In is important that the wall be level before applying the system.
- Prime all sides of EPATHERM® etp with Primary coat EPATHERM® etg Use approximately 0.7L per m2, allow to react for 45 minutes before the next stage. Freshly sawn edges must be re primed.
- Apply board adhesive EPATHERM® etk with notched trowel, 4-5kg per sqm
- Paste and fix Indoor climate board EPATHERM® etp as closely as possible – avoid joints repositioning light switches as necessary.Avoid cross joints keeping 200mm staggered joints. 1000mm * 750mm in 30 or 50mm thickness as standard (20-160mm available on demand 20mm reveal boards available or wedge boards for floor connections) If surface is smooth use plastic mushrooms to affix boards in addition to adhesive. In all cases above 3m us 5 plastic mushrooms per board.
- Fill all joints and unevenness on the surface with EPATHERM® multi-eti also applying a base coat of plaster 4-5mm deep, 1-2kg per m2
- Insert EPATHERM® etw Alkali – resistant glass fibre fabric reinforcement mesh into Multi-eti (5)
- As the first layer dry’s apply a Finish coat of EPATHERM® multi-eti to desired finish.
The application is proposed as follows: –
- EPATHERM® etk Board Adhesive
- EPATHERM® etp Indoor climate board with Primed coat EPATHERM® etg
- EPATHERM® multi-eti also applying a base coat with EPATHERM® etw Alkali – resistant glass fibre fabric
- EPATHERM® multi-eti finish coat
Application
Unique system advantages
Insulation and regulation of room air conditions
Optimal fire protection
No health risks – purely mineral composition
High alkalinity prevents mould growth
Easy and flexible application